Showing posts with label SOCIAL MEDIA. Show all posts

0 How To Add MultiColor Bookmarking Widget On Blog?

Another most important ,blogger tutorial, about “how to Multi Color Bookmarking Widget On Your Blog”. Yes I am introducing you about eye catching and fascinating bookmarking ,widget,. This is very much important or blog to bookmarked by others to increase readers traffic on blog. This widget is fancy and easy to use.

How To Add Multi Color Widget in blog?


Do these steps to add multicolor Social bookmarking widget
MultiColor Bookmarking Widget
  • 1.      Go to Blogger.com
  • 2.      Sing in to your blogger account
  • 3.      Go to your blog
  • 4.      Go to the layout
  • 5.      In layout go to gadget
  • 6.      In gadgets select HTML/JavaScript
  • 7.     Copy the code given below and paste in HTML/JavaScript

<style type='text/css'>
/****** coded by www.operaorbs.blogspot.com *******/
.oo-multicoloredwidget {  width: 295px;  margin: -5px;  text-decoration: none; }
.oo-multicoloredwidget ul {  margin: 0px;  padding: 0px;  text-decoration: none;}
.oo-multicoloredwidget ul li {  list-style:none;   padding: 0px; text-transform: none; text-decoration: none;}
.oo-multicoloredwidget ul li a {   color: #ffffff;   display:block;  text-decoration: none;}
.oo-multicoloredwidget ul li a:hover {  color: #ffffff;  background-color: #333;  text-decoration: none; }
.oo-multicoloredwidget ul li .rss { background: url("http://i1203.photobucket.com/albums/bb382/chandeep10/social-icons/RSS-1.png") no-repeat scroll 11px center #4CBB17; background-size: 20px; padding: 18px 45px; }
.oo-multicoloredwidget ul li .facebook { background: url("http://i1203.photobucket.com/albums/bb382/chandeep10/social-icons/Facebook-1.png") no-repeat scroll 11px center #499DF5; background-size: 20px; padding: 18px 45px; }
.oo-multicoloredwidget ul li .google { background: url("http://i1203.photobucket.com/albums/bb382/chandeep10/social-icons/google.png") no-repeat scroll 11px center #E0464A; background-size: 20px; padding: 18px 45px; }
.oo-multicoloredwidget ul li .twitter { background: url("http://i1203.photobucket.com/albums/bb382/chandeep10/social-icons/Twitter.png") no-repeat scroll 11px center #7D26CD; background-size: 20px; padding: 18px 45px;}
.oo-multicoloredwidget ul li .linkedin { background: url("http://i1203.photobucket.com/albums/bb382/chandeep10/social-icons/LinkedIn-1.png") no-repeat scroll 11px center #FF664A; background-size: 20px; padding: 18px 45px; }
/****** coded by www.operaorbis.blogspot.com *******/
</style>
<div class="oo-multicoloredwidget">
<ul>
<li><a class="rss" href="http://feeds.feedburner.com/OperaOrbis">Subscribe to Our RSS Feed</a></li>
<li><a class="facebook" href="https://www.facebook.com/PrinxessRabi.OperaOrbis">Find Us on Facebook</a></li>
<li><a class="google" href="#">Join Us on Google+</a></li>
<li><a class="twitter" href="https://twitter.com
/PrinxessRabi">Follow Us on Twitter</a></li>
<li><a class="linkedin" href="#">We are on LinkedIn</a></li>
</ul>
</div>

Customize

  • Change Pink colored text with your Google+ username.
  • Change Yellow colored text with your Twitter username.
  • Change Green colored text with your LinkedIn username.
  • Change Red colored text with your Feed-burner username.
  • Change Orange colored text with your Facebook page username.
  • Click on "save" button and visit your blog.
Congratulations! you have done.


Final Words


I hope you will really enjoy blogger tutorial about “how to Multi Color Bookmarking Widget On Your Blog”. This multicolor blog will really be very helpful and for any problem comment below. I will fix the problem.

Published By:
OperaOrbis
on 09:24

2 Facebook Auto Liker

By the “Facebook Auto liker” you can get unlimited number of likes. Facebook Autoliker is a software through which by you can get millions of likes within hour without doing any efforts. A lot of tips and tricks are available on search engines but all are fake and don’t work. You must keep in your mind that no one facilitate you without getting reward. So people are offering free tips and tricks to get free facebook auto likes, just to get traffic on their pages.
Facebook Auto Liker

How To Get Facebook Auto Liker?
I am introducing the “Facebook Auto liker” which definitely is not free. To get “Facebook Auto liker” you have to pay amount of just 12$. This is one time payment. I will give you complete “Facebook Auto liker” package in just 12$. The software and script is 100% working and genuine. If the software or script doesn’t work then I will give you new software and the complete step by step guide again and again till your satisfaction.
100% safe facebook likes
High quality facebook likes
Facebook Auto Like
Payment Method
Pricing: 12$
If you want to get the “Facebook Auto Liker” then Contact Us.
Note:
All the payments will be in PayPal dollar or through Bank wire.
No other way of payment is acceptable.
In all orders the buyer has to pay first, and then the order will be fulfilled within 24hours.

Published By:
OperaOrbis
on 10:14

0 Add Attractive Social Subscription Gadget

Today I am introducing the coding of very beautiful attractive social/email subscription box. This is very easy to add in your blog. You can place it anywhere I the blog either in side bar or footer. This widget I especially coded for my new readers and newbie’s.

 Social/Email subcription Box
Importance Of This Social Sharing Gadget

1- This gadget loads very quickly o any browsers
2-      It is useable on wordpress also
3-      It’s easy to use and can be place in blogger easily
4-      It can be placed anywhere in blog sidebar or footer
5-      It will increase you subscribers
6-      It is attractive with hover effects
Why This Gadget Must Be Added In Blog

If you want to make your blog attractive and professional then you must add this gadget. This is totally created on the blogger techniques and is totally created by the HTML and CSS3.
This gadget doesn’t have any credit links and totally 100% free. You must link back to us to share this gadget in your blog.


How To Add Attractive Social Subscription Gadget In Blog
  • 1-      Now go to Blogger.com
  • 2-      Sign in > Go to Layout
  • 3-      Click on Add A Gadget
  • 4-      Select HTML/JavaScript
  • 5-      Copy the code given below and paste it in HTML/JavaScript box

 
<div id="subscribers"><div class="subscriptionboxtitle"><h4>Sign Up With In Seconds</h4><span style="color: white;">Sign Up With Our Newsletter And Get Daily Fresh Updates Straight In Your Inbox (We Hate Spam! We Promise)</span></div><div class="subscriptionsingup"><form action="http://feedburner.google.com/fb/a/mailverify" id="subscribe" method="post" onsubmit="window.open( 'http://feedburner.google.com/fb/a/mailverify?uri=operaorbis', 'popupwindow', 'scrollbars=yes,width=550,height=520');return true" target="popupwindow"><input id="subscriptionbox" name="email" onblur="if ( this.value == '' ) { this.value = 'Enter your email address.......'; }" onfocus="if ( this.value == 'Enter your email address.........') { this.value = ''; }" type="text" value="Enter your email address......." /><input name="uri" type="hidden" value="operaorbis" /><input name="loc" type="hidden" value="en_US" /><input id="subscribebutton" type="submit" value="Yes, I Want Daily Updates." /><br /><span style="color: white;"><span style="font-size: xx-small;">(</span><span style="font-size: xx-small;">Note:</span></span><span style="color: red; font-size: xx-small;"> </span><span style="color: white; font-size: xx-small;">When signing up you will initially receive a confirmation email requiring your approval to complete the Subscription.<Script Language='Javascript'><!--

document.write(unescape('%3C%61%20%74%61%72%67%65%74%3D%22%5F%62%6C%61%6E%6B%22%20%72%6F%6C%65%3D%22%62%75%74%74%6F%6E%22%20%63%6C%61%73%73%3D%22%63%72%65%64%69%74%73%22%20%68%72%65%66%3D%22%68%74%74%70%3A%2F%2F%77%77%77%2E%61%6C%6C%62%6C%6F%67%74%68%69%6E%67%73%2E%63%6F%6D%2F%22%3E%47%65%74%20%49%74%3C%2F%61%3E'));//--></Script></span><span style="color: white; font-size: x-small;">)</span></form></div><style>

    .subscriptionsingup {    padding: 20px;}

    #subscriptionbox {    padding: 10px 15px 10px 15px;    width: 260px;    text-shadow: none;    font-size: 16px;    color: #009999;    margin-bottom: 7px;transition:background 400ms;}#subscriptionbox:focus{background:#ffcb00;}#subscribebutton {    background: #000;    border: none;    font-weight: 700;    color: #fff;    width: 257px;    padding: 15px;    text-shadow: none;    font-size: 15px;    cursor: pointer;    padding-right: 10px;    margin-left: 2px;}

    .thin {    text-shadow: none;    font-weight: 300;}

    #subscribers {    float: left;    width: 296px;    background: #009909;    border: 4px solid #000;    font-family:open sans;}

    #whatyouget {    background: #03628f;    padding: 10px;}

    ul.whatyougetwith li {    background: url(https://blogger.googleusercontent.com/img/b/R29vZ2xl/AVvXsEgeeTJhlVEcQ5rhMTVfLlfaeY20kMUwU1qgswOef2PLXDUJTJXyyJeHEj5qgwiZKrtnUKIlGb3zTrsmfY_4zyBdId4cWsozCB0eJnFdEoC_qESDhY_Yp_eA_fcy0CqhTY682sEfvc5sCh4/s1600/checkmarkk.png) no-repeat;    margin: 10px;    padding-bottom: 10px;    text-shadow: none;    font-size: 14px;    line-height: 20px;    text-shadow: none;    font-weight: 700;    color: #fff;    overflow: hidden;    padding-left: 25px;}

    .whatyougetwith ul {    margin: 30px 30px 0 25px;    padding: 0 0 0 25px;}

    .subscriptionboxtitle {    height: 110px;    padding: 10px;    background: #009909;}

    .subscriptionboxtitle p {    text-shadow: none;    font-size: 14px;    padding: 0px;    margin: 0px;    line-height: 20px;    color: #fff;    margin-top: 5px;    text-align: center;}

    .subscriptionboxtitle h4 {    text-shadow: none;    font-size: 23px;    margin: 0px;    padding: 0px;    text-align: center;    line-height: 25px;    color: #fff;    padding-top: 15px;    padding-bottom: 10px;}

    </style></div>
</div>

Customization
  • 1-     Change the PURPLE Color with your feed burner link
  • 2-     Change the ORANGE Color with your desire heading
  • 3-     Change the SKY Color with your Desired sign up message
  • 4-     Now Save the HTM/JavaScript box
  • 5-     Congratulations! You have completely added this gadget. You can place it anywhere in the blog by dragging HTML/JavaScript box.
Your Turn

Hope you have added this gadget very easily. If you have any problem related to its addition then must contact me by commenting below. If you like this please must share it to your friends. You can contact me for more SEO tips/widgets/gadgets or other related blogging material. Stay in touch by comment below.

Published By:
OperaOrbis
on 10:48

0 Use AddThis Social Sharing Button In Blog

One of the favorite gadgets of bloggers is “AddThis Social Sharing Button In Blog”. This is the important gadget to share posts on the different Medias. I also added this gadget on my blog. Many newbie’s dot know how to “Use AddThis Social Sharing Button In Blog”. Let us continue the tutorial for the addition of this gadget.
Importance Of AddThis Social Sharing Gadget
  • 1-      The posts can be shared on more than 260 social Medias.
  • 2-      Your blog will be visited by different readers from different social medias
  • 3-      This gadget loads quickly and the posts will be shared by visitors easily
  • 4-      This gadget appears in the form of bar which is easily adjustable in blog.


How To Add Add This Social Sharing Buttons In Blog
  • 1-      Go to AddThis website
  • 2-      Sign in/sign up
  • 3-      If you are signing up then click on “create account” fill the form and give the info like email, username password etc
  • 4-      Now scroll down the page, there is another box “Get Sharing Buttons For”
  • 5-      From “Get Sharing Buttons For” select blogger option from different options
  • 6-      Now after this “Select Style” from different style options
    addthis Social sharing buttons style selection
  • 7-      After this scroll down and click on the box “Grab It” 

  • Grab code of Add This Social sharing buttons
  • 8-      Copy that HTML code

NEXT TO DO IS
If you want to add social sharing buttons at the end of blog post then follow below steps
  • 1-      Now go to Blogger.com
  • 2-      Sign in > then go to its Template
  • 3-      After this click on Edit HTML Button
  • 4-      Now the HTML blogger code page will open, here click anywhere inside the HTML code, press ctrl+F
  • 5-      Now in the finding box write this <div class='post-footer'>  and find this code
<div class='post-footer'> 
  • 6-      Just above this code <div class='post-footer'> , place the code you created and copied in step 8 above
  • 7-      Now save the template congratulations! You have done.

If you want to add social sharing buttons in beginning of blog post/below title then follow below steps
  • 1-      To add the social sharing button in the beginning of blog post or just below the title then search this cod

  • 2-      Repeat all the steps from 5-7
  • 3-      Now save the template congratulations! You have done.

Closing Words

After following all steps, open your blog in browser you will see the addthis sharing social gadget at the end/top of the posts. My tutorial is complete and well on the topic “Use AddThis Social Sharing Button In Blog”. If you like my post then please share it to others, if not satisfied then let me know in comment box please,

Published By:
OperaOrbis
on 11:18

0 How To Add Professional Facebook Like Box In Blog

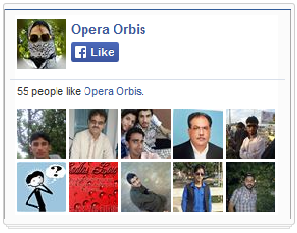
To get more traffic from social media, you need to have a lot of fans and followers. Then these fans and followers will convert in to the true readers. After connecting to social media you will get tons of readers on your blog/website. For this purpose I am introducing a very beautiful fancy Facebook like gadget. This is very easy to use and you can use this gadget without any credits or facebook links. This is truly looking professional facebook like gadget. You can use this professional facebook like gadget by following simple steps. Let us discus about “How To Add Professional Facebook Like Box In Blog”.
 

What is Importance Of This Gadget?

This is very important gadget as it haves several benefits like:
  • 1-     It gives your blog the professional looks.
  • 2-     It increases the readers traffic within days
  • 3-     It boost up you facebook page likes within days
  • 4-     This gadget don’t have any other credit link like Get it/Grab it etc
  • 5-     This gadget you can use on any template like blogger/weebly/wordpress etc
  • 6-     This gadget can be placed anywhere in the blog, without any restriction
How To Add Professional Facebook Like Box In Blog

The steps to add the fancy facebook like box are very easy as:
  • 1.      Go to Blogger.com
  • 2.       Login to your blogger account
  • 3.      Then select your desired blog
  • 4.      Now go to it Layout
  • 5.      In layout, open  Add a Gadget link(a new page will open instantly)
  • 6.      There select HTML/JavaScript
 

<style>
.OOfb{width:280px; height:200px; border-radius:3px; position:relative; padding:5px 10px 15px 0; background:#fbfbfb; border:1px solid #cecece}
.OOfb:before{background:#fbfbfb; border:1px solid #dedede; content:""; position:absolute; bottom:-3px; left:2px; right:2px; height:1px}
.OOfb:after{background:#fbfbfb; border:1px solid #dedede; content:""; position:absolute; bottom:-5px; left:4px; right:4px; height:1px}
</style>
<div class="OOfb">
<iframe src="//www.facebook.com/plugins/likebox.php?href=http://www.facebook.com/ PrinxessRabi.OperaOrbis&amp;width=292&amp;height=258&amp;colorscheme=light&amp;show_faces=true&amp;border_color=%23fbfbfb&amp;stream=false&amp;header=false&amp;" style="border:none; overflow:hidden; width:287px; height:210px;" ></iframe>
</div>
Customization

  • 1-     Change RED color text with your Facebook Fan page link and click on save button.

Closing Words

I am glad to introduce this gadget. For more suggestions and tips let me know. Please share my work on social media and with your friends. For more help leave a comment below.

Published By:
OperaOrbis
on 05:43

Next Page Home
.